Do you have a dozen Chromebooks and cords all over your classroom? It is easy to create an organized system for storing them without taking up too much space in the classroom. You would need a cart or rack to be sturdy, but also easy to maneuver for keeping the Chromebooks organized and charged. The labels should be clear enough for students to know which Chromebook, charging cord, and charging port is assigned to them.
I love to find awesome classroom decor ideas. As an Amazon affiliate, I may earn a commission for purchases using my links. Learn more. The ideas and paid links below are based on Amazon finds that are great for your classroom Chromebooks. The most affordable Chromebook storage and charging stations are at the bottom of this list. The last four bulleted points below are cheap DIY hacks for storing Chromebooks, all you'll need are kitcken storage racks.
(Sorted by price in ascending order)
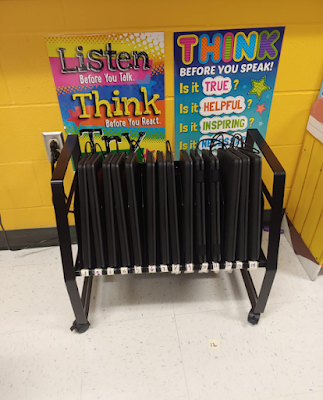
- Black Chromebook Storage Cart: If you need a Chromebook cart that does not take up a lot of room, this Chromebook cart should be an ideal solution. It holds up to 14 Chromebooks, and there is cord management on the back side of the charging cart and a tray for the cords and power packs on the bottom of the charging cart. A mobile cart like this keeps the Chromebooks together and makes it easy to move from room to room.
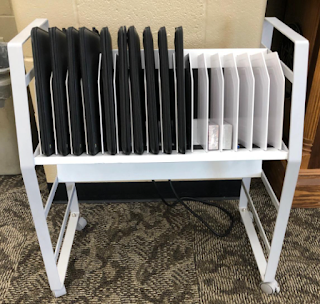
- White Chromebook mobile cart: This metal mobile cart holds up to 16 Chromebooks for students to use. The back is laid out nicely with room to store and plug in all the chargers, and there are clips to guide the cord placement for each slot. Its design makes it easy to plug in and unplug the Chromebooks. Just be sure to number the slots and Chromebooks for optimum ease and organization. It rolls around and if you need to move it you only have to unplug one plug. Also, it is super easy to keep all of them charged up for the next day in class. In a classroom setting where you have a number of laptops and Chromebooks, this is essential equipment.
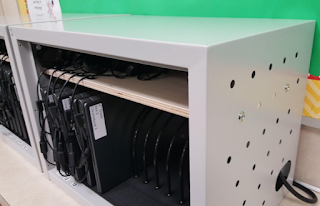
- Metal Locking Charger Box: This Chromebook charger box can be mounted on a wall or kept on a counter. Many charger boxes look cluttered with the cords hanging all over the Chromebooks. In the picture above, the teacher created a solution for her cable management by adding a piece of plyboard to the inside of hers to keep the cords separate from the laptops. This is how you can do it too if you have a similar problem: Cut a 3/8" piece of plywood to fit the inside dimensions. remove a couple of the dividers temporarily to get it inside the case, mount it with screws through the vent holes and put the dividers back in. Put the back screws in first on either side, plug the chargers in and then lift the shelf into place and put the front screws in. Bundle up the charger cords and cable tie them while leaving a tail for the part that plugs into the Chromebook. Use cable clamps with a short screw and to hold the cables in place.

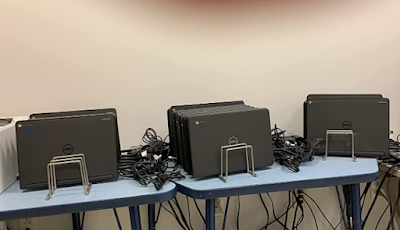
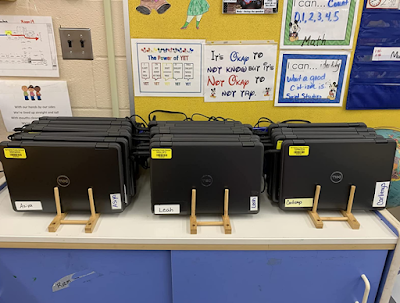
- Use wooden stands: This bamboo wooden stand holds five Chromebooks at a time. The cords can be hidden in a compartment under the laptop stand.
- Use metal kitchen racks: You know the metal racks that you store baking trays and dishes in? They're also good for storing Chromebooks. Just stack the Chromebooks vertically for a cost-effective way to have a cheap Chromebook stand in your classroom that does not require any assemble at all. An optional tip it for you to use a glue gun to add some cushioning along the bars to prevent them from scratching your Chromebooks.
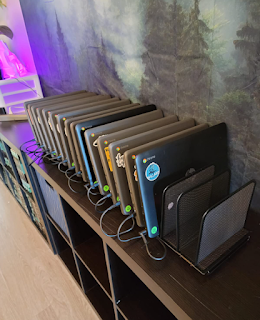
- Store Chromebooks in a wire mesh desk organizer: These wire mesh racks are roomy and sturdy for being a storage stand for classroom Chromebooks. The racks are sold in pairs and each pair holds ten Chromebooks. If you choose to connect the pair, they can hold eleven Chromebooks.
- Bamboo Dish Racks: Another kitchen based item that works for classroom storage is a bamboo dish rack. The long prongs are evenly spaced to hold Chromebooks upright. You should use zip ties or cables to anchor it onto a shelf to keep it secured so that the laptops won't make it topple over. This is one of the most affordable ways of having a DIY charging station. Two or three dish racks would be enough to service a classroom without causing you to break your budget.

As a general rule, it helps to color code the Chromebooks with the charging ports and the charging cords. Number stickers can be used instead of the colorful washi tape color coding system if you prefer. Having shorter charging cords helps to reduce the clutter around your charging station. Once you have the right setup for your Chromebooks, you will be glad that students are not tripping over wires. They will be able to use the power cords and plug in their Chromebooks every day.