

Standing desks are all the rage nowadays. It is based on the argument that working upright offers more benefits than sitting. With that, learn how to create a DIY standing desk for your home office.
One study reveals that standing for six hours instead of sitting does not only help with weight gain but also in shedding pounds.
Aside from that, muscle activity from standing is associated with lower risks for strokes and heart attacks. People may burn more calories this way.
RELATED: DIY Home Office Inspiration
Building Your DIY Standing Desk
Materials needed:
- Two 12 in. 2x 2 for tabletop
- Six 10 in. mending plates
- 24 1-1/4in. screws
- 3/4 in. black iron pipes and fittings
- Tape measure, t-square, or speed square
- Table saw
- Danish Oil
- Orbital sander
Step 1: Get the Measurements
The perfect standing desk should be specifically suited for you. Before constructing your own desk, you need to get your body measurements.
You wouldn’t be slouching when working on your standing desk, so do the same when measuring yourself. Adopt a natural, comfortable stance that you can maintain for a long period of time. Your computer monitor should be even with or just below your eye line.
Note the position of your elbow. The top of the desk should be appropriate for your elbows to rest on. This is extremely important if you will be using a mouse or will do a lot of drawing or writing. With the right height, you wouldn’t have to stoop or lower the center of your gravity.
Note: Keep a chair nearby. Don’t throw out that old office chair just yet. Rather than stand nonstop throughout the day, it would be much healthier to combine standing and sitting.
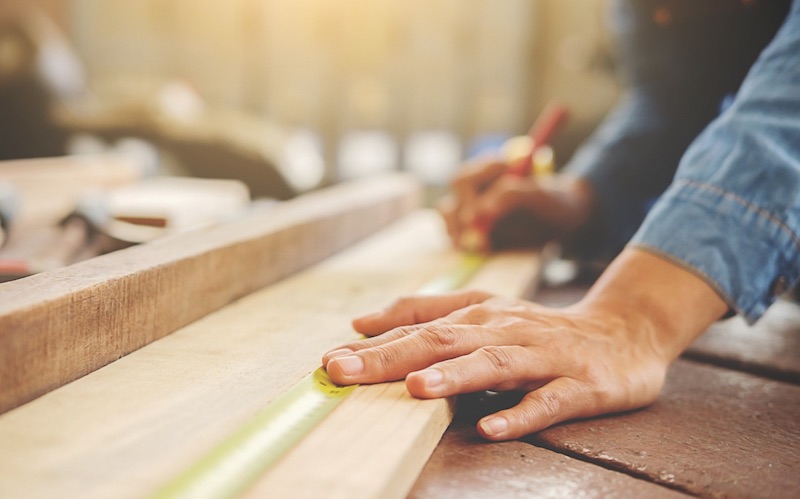
Step 2: Cut the Wood for the Tabletop
The tabletop really depends on how wide you want it to be. Use a speed square to ensure you cut a straight edge.
Step 3: Sand the Edges
Use the orbital sander to sand the edges and corners of the tabletop. Make sure to sand the wood evenly. Apply a coat of Danish oil to finish the desk.
Step 4: Install the Mending Plates
Hold the board in place and install the six mending plates. This will be used to center the weight of the table and at the same time, can be used for future attachments for wiring, etc.
Step 5: Attach the Pipings and Fittings to Make the Legs
Attach the pipings to make the legs of your standing desk. Don’t forget to attach the end caps for the feet. Make sure the legs stand evenly. Screw them under the table once you’re done.
Step 6: Level the Table
After installing the legs, put the desk right-side up and check if it is standing flat. If not, adjust the end caps on either side to keep it flat.
What’s great about using pipes is you can adjust them to your preferred height.
RELATED: Nifty DIY Desk Organizer Ideas To Keep You Productive
Improvise a Standing Work Station and Other Ideas

1. Look Around the House
Check around your house if there is a taller alternative to the desk you are currently using. It could be a kitchen counter or bar top, an elevated café-style table, or a dresser of medium height. Move your laptop, books, or paperwork to your new workspace.
2. Work from a Different Place
Finding a different workplace helps break the monotony of constantly sitting at a traditional desk and give you a much-needed break from sedentary living.
3. Use Objects as a Desktop
Your platform can either be stacked boxes, tray, or others that can serve as a “lift” for your current desktop. You can easily switch from standing to sitting by just removing the underlying objects as you see fit. Just make sure that the supporting platform is sturdy enough to hold your computer and devices.
4. Use a Cabinet or Shelf
Any furniture with shelves of varying heights can be effective as a standing desk. A large bookcase, for example, is great for holding things like a computer, paper documents, books, utensils, and other accessories. You can drill small holes for electric outlets or wall mounts.
What to Consider When Building a DIY Standing Desk

1. Cost
Standing desks are already getting cheaper. When building your own standing desk, make sure that you won’t exceed the cost of buying a standing desk converter.
2. Consider Yourself
Build your standing desk with comfort and maintaining good posture in mind. A DIY project can easily overlook this feature.
3. Height Adjustment
Switching from sitting to standing is an important consideration when building a standing desk. You need to make sure that your desk can be easily adjusted.
4. Ideal Desk Height
Keep in mind proper workplace ergonomics. The height of the typing surface should be just under the bend in your elbows.
Watch this video from Tommy Tompkins and learn how to build a DIY standing desk that can be turned to a drafting table:
A DIY standing desk is not only a healthy option but also helps boost your productivity when working at home. By learning how to create your own standing desk, you can save the cash that you will use to buy a simple standing desk.
Have you tried using a DIY standing desk in your home office? Share your experience in the comment section below.
UP NEXT:
- DIY Outdoor Daybed Project You Can Do While You’re Stuck At Home
- How To Make a Romantic DIY Bed Canopy
- DIY Wooden Crate Shelves | DIY WOOD PROJECTS
Don’t forget to stay connected with us on Facebook, Twitter, Pinterest, and Instagram!
The post Build Your Own DIY Standing Desk For Your Home Office appeared first on DIY Projects Craft Ideas & How To’s for Home Decor with Videos.