Step 3: Multi-Sensory Approaches to Pre-Writing
Congratulations on making it to the third of four pre-writing blogs: multi-sensory approaches to pre-writing! If you haven’t read about the first two steps: (1) starting with gross motor skills and (2) strengthening fine motor skills, check those out before reading on! We are finally ready to talk about something that better resembles “writing” in the traditional sense! But don’t be fooled… we aren’t going to jump right into pencil and paper tasks! Before we get started on using multi-sensory approaches to pre-writing strokes, let’s review our previously-covered underlying skills:
- Body awareness & motor planning
- Crossing midline
- Core strength & shoulder stability
- Strength of the hand muscles
- Establishing hand dominance
- Development of functional grasps
All of these “building blocks” lay the foundation for your children to become writers!
Developmental Sequence for Pre-Writing
As with anything, there is a typical sequence for the acquisition of writing skills. Does this mean that your child HAS to master one “pre-writing” stroke before they progress to another? Absolutely not! However, keeping in mind the typical developmental sequence will allow you to best support your pre-writer in obtaining the necessary skills to form letters. It will assist you in not expecting a higher-level skill right off the bat. Let’s dive in, and you’ll see what I mean!
Becoming a Writer
Just because your child/student may have the physical skills needed to make marks on the page doesn’t mean that they are ready to be a “writer”. Children aren’t necessarily born with the knowledge that they can make marks on a page and they have meaning. Does your child recognize their name in written form? They don’t need to know each letter of their name. Similarly to how a child can recognize the logo for their favorite restaurant or store, can they identify their name if it is labeling something? Try labeling their seat [at the dinner table or their desk] as well as all of your child’s personal belongings to show them that those marks signify THEM! Check out these functional name tags from Simply Special Ed for a fun spin on traditional name tags!
Let’s think about it this way — If you, as an adult, were expected to read or write in hieroglyphics or a language with which you were unfamiliar, how would you do? Probably NOT well! Even as someone who helps students gain fine and visual motor skills for writing as their profession, I would have a hard time! That is because the symbols don’t have any meaning. Writing my name in a language that doesn’t use letters or symbols with which I am familiar would mean that I’d simply be putting random marks on the page. Our students who don’t yet know their letters are in the same boat! Don’t jump ahead! Begin with pre-writing strokes [that will eventually work together to turn into letters]. Teach them using multi-sensory approaches. You can do this all while you teach the skill of letter identification! At least have your child associate specific symbols with meaning [like their name!].
Starting Strokes for Pre-Writing
While not definitively linear in their progression, there is a general sequence that pre-writing skills follow as the child works towards age-appropriate handwriting. A child first needs to explore materials with which they can write. We will touch on that more in the next section! But again, think multi-sensory or incorporating as many senses as possible. Things like rhymes/songs, movements, scented markers, paint, etc. are all great!
Scribbling on paper is step #1! Next, the child may be ready to progress towards imitating the adult. You make a vertical line. The child makes a vertical line. Motor imitation in general is a great skill to target before expecting a child to write independently. Check out my first pre-writing blog if you need some more ideas on how to target gross motor imitation! Vertical, horizontal and circular lines are typically the first to be acquired and are the easiest to create. Start there! Once your child can imitate, see if they can copy. If the pre-writing stroke is shown to the child, can they make it on their own without watching someone do it first? If not, maybe go backward a step to demonstrate the stroke! Eventually, your student will be able to move on to a cross shape, diagonal lines, an X, square, triangle etc. until they have all the necessary pre-writing strokes to build letters!
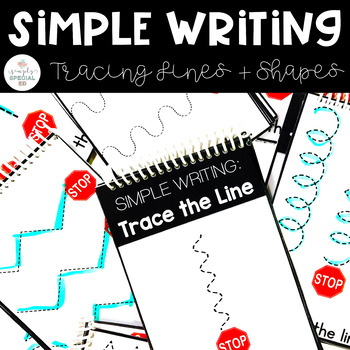
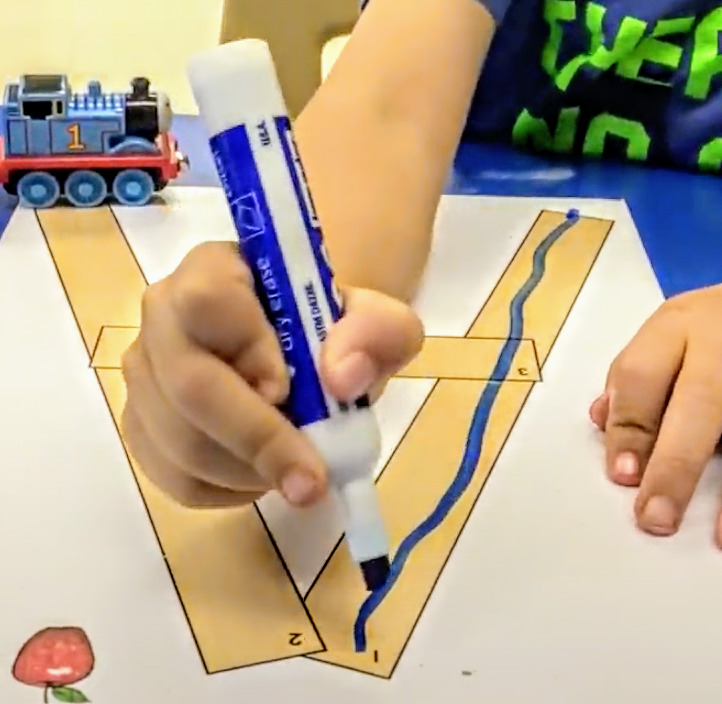
Don’t forget about tracing! I always caution people on heavily relying on tracing for students to be successful. It can be very challenging to fade out the dotted lines or highlighter marks. I often see students [who lacked some of the pre-requisite skills we’ve mentioned] get “stuck” on tracing. However, to bridge the gap between imitating and copying, maybe have your child trace the lines first, then copy! Give a clue for where to start [always at the top!] to ensure accuracy in the tracing! The Simple Writing Bundle for Special Education is a great resource for this with over 400 pages of line tracing, shape tracing, and letter writing practice for students who are not yet independently writing!
A Note on Hand over Hand
Remember: we want the child to not only learn at their own pace, but to be both successful and independent! Try not to use hand over hand! This is especially true if you haven’t asked the student if it is okay to physically help them. Check out Taylor’s blog on why she doesn’t use hand over hand as she reflects on an Occupational Therapy podcast called “Two Sides of the Spectrum”. It is worth the read [and listen!]. It has really influenced my practice, and I know it will benefit you and your child(ren)!
A Multi-Sensory Approach for Pre-Writing
Now that we know what types of things our children should be practicing with regards to pre-writing, how can we make it fun and impactful?! As you are likely aware, there are a variety of different learning preferences. Not all students learn the same way. In fact, most children learn well through play! Incorporating a variety of senses into learning activities can help students pick up concepts more quickly. Below are a few of my favorite non-traditional, multi-sensory ways to work on pre-writing strokes [that you can then use when practicing letters too!].
Build it!
Kinesthetic and tactile learners may love to create things with their hands! We’ve talked in previous blogs about the many different ways you can use play dough to build fine motor skills [see this blog on 5 ways to utilize play dough]. You can use play dough for pre-writing too! Use a toothpick or other tool to write the pre-writing strokes in the play dough! Trace it with your finger! Roll the play dough out into snakes and form them into the pre-writing strokes! The possibilities are endless! To add even more multi-sensory engagement, try making your own scented play dough! The Simply Special Ed Visual Sensory Recipes resource has some great recipes for this! Not to mention all the other fine motor skills you will be utilizing by cooking/following the recipe!
Legos®, Wikki Stix [affiliate link], and other blocks or materials make great tools for building pre-writing strokes. Learning the concepts of “down” and “over” can be challenging at first, especially if your child has any kind of language delays. Maybe make train tracks into a cross shape, or practice understanding the concept of “diagonals” using these materials or preferred toys. Handwriting Without Tears is known for their multi-sensory approach to handwriting! I love to use their wooden pieces [affiliate link] when children are first starting to learn their letters and are still in that “pre-writing stage”.
Paint it!
Kids love paint! Even my tactile-sensitive kiddos like to play with “mess free” paint either in a ziplock baggie or with gloves on! Don’t be afraid of a little mess! I love to recommend window paint/markers [affiliate link] because children think it is SUPER fun to be able to “draw on the walls” and working on a vertical surface is great for developing a mature grasp. When holding a pencil, wrist extension is important. When students “hook” the wrist, it limits their ability to use refined movements when writing. Easels, chalk boards, taping paper on the wall, coloring underneath the table, etc. are all great ways to get creative with coloring/writing tasks while promoting wrist extension and shoulder stability!

In addition to shaving cream and finger paint [which are always great multi-sensory options!], I have had a lot of success with drawing trays! Think salt trays [affiliate link], but more creative with the types of fillers you use in the trays. I like to make different trays based on the season! Dirt in the spring, sand in the summer, snow [fake or real!] in the winter, etc. Simply Special Ed has a great resource to target pre-writing skills as well! Check out Simple Writing: Tracing Lines and Shapes Books for an easy no-prep way to work on pre-writing tracing skills that can easily pair with some of these other multi-sensory approaches! Does this skill get too easy? Try “drawing” a shape on your child’s back and see if they can imitate that shape in their drawing tray! Be creative!
Functional Grasps
As you may have guessed, now that we are getting into skills more closely resembling functional writing, pencil grasp is something to which we need to start paying some attention. While not all of us use what is typically considered a “mature tripod” grasp [myself included!], there are definitely benefits to working towards establishing a functional grasp early. This can be a hard habit to break later. I want to briefly talk about three different ways to promote a mature grasp:
- Small writing utensils
- Larger/thicker writing utensils
- Pencil grippers
Small Writing Utensils
While breaking fresh crayons into tiny pieces might make some of you cringe, it really is a good way to promote an appropriate grasp! Earlier developing grasps such as a fisted grasp [whole hand wrapped around the crayon held in the palm] or a pronated grasp [all fingers on the crayon with index finger pointed towards the paper] are developmentally appropriate for our early learners. However, there are some ways to encourage refining those grasps. Small writing utensils is one of them! By using a smaller writing utensil, the child cannot hold it with all of their fingers. They are more likely to use a three fingered grasp [with their thumb, index and middle fingers] if the writing utensil is too small for their other fingers to fit! Handwriting Without Tears makes flip crayons [affiliate link] that are not only small, but also promote in-hand manipulation skills [like we talked about in a previous pre-writing blog] if the child “flips” the crayon without use of their other hand! Some of my students LOVE markers, and don’t prefer to use crayons or color pencils [I use golf pencils sometimes!]. Since you can’t break a traditional marker into smaller pieces, Crayola makes pip squeak markers that are great!
Larger Writing Utensils
You might be wondering why “little kid” coloring materials are often thicker or larger than traditional materials. Good question! Sometimes, our students have yet to develop the fine motor skills needed to effectively utilize smaller utensils [at least without frustration!]. If your child isn’t there yet, consider trying some larger writing utensils! Ticonderoga® makes tri-write pencils [affiliate link] that are triangular in shape [promoting that tripod grasp], but are thicker like preschool/kindergarten pencils. These are a great place to start! Bingo daubers/dot markers or finger/knob crayons allow for a more gross grasp, but are great ways for students with fine motor delays to participate in art, drawing and writing tasks!
Pencil Grippers
As a school-based OT, I get asked about pencil grippers quite a bit! There are quite a few differing opinions on the pros versus cons of using a pencil gripper. It just depends on the kid! I usually attempt to naturally facilitate a mature grasp using some of the strategies mentioned above before trialing a pencil gripper. Some children become dependent on them for success, and they are not always available. Some writing utensils don’t fit a gripper. Kids also lose them frequently! However, I have also seen great success with introducing writing with a pencil gripper, and slowly fading it out so that the proper hand/finger position becomes the automatic/natural grasp. It all depends! Below are some pencil grippers you may want to try out if you are looking for one to support your student! As always, if you work with an OT, get their opinion and suggestions as well!
Types of Pencil Grippers
-
Handi-Writer [affiliate link]
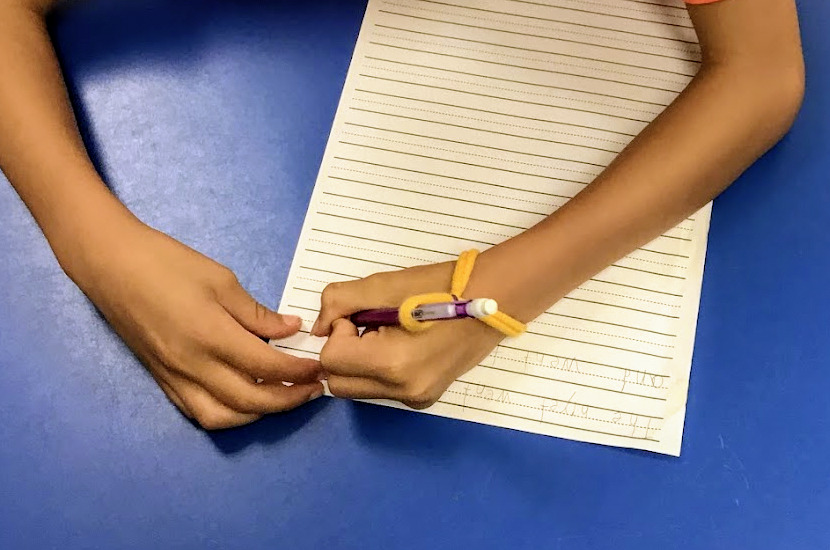
- I like this one because it positions the pencil to “rest” in the space between the index finger and thumb [what I tell my students is “the pencil’s bed”]. It also separates the two sides of the hand with the “charm” that is attached to be held with the pinky/ring fingers. This pencil grip is also easy to “DIY” with a rubber band and small item like a pom pom or mini eraser!
-
The Pencil Grip [affiliate link]
- This grip works well for both right and left handers! It indicates where to put the thumb for both types of students (R/L), and is very comfortable for students!
-
Claw Grip [affiliate link]
- For students who have difficulty isolating the thumb, index and middle fingers needed as the “worker” fingers when writing, this grip gives a contained spot for each finger!
-
Twist ‘N Write Pencils
- Some students really benefit [and are motivated by!] this unique design. I like these for students who need help with ergonomic positioning/joint protection!
We have almost made it to the final blog in the “pre-writing” series! When working towards writing with your children, first, think big with gross motor skills, next build strength with fine motor skills, and then start practicing pre-writing strokes in a multi-sensory way! As always, engage students by using their interests, with activities that provide that “just right challenge” and that are play-based! You will have little writers in no time!


The post Building Blocks for Success in Pre-Writing appeared first on Simply Special Ed.


